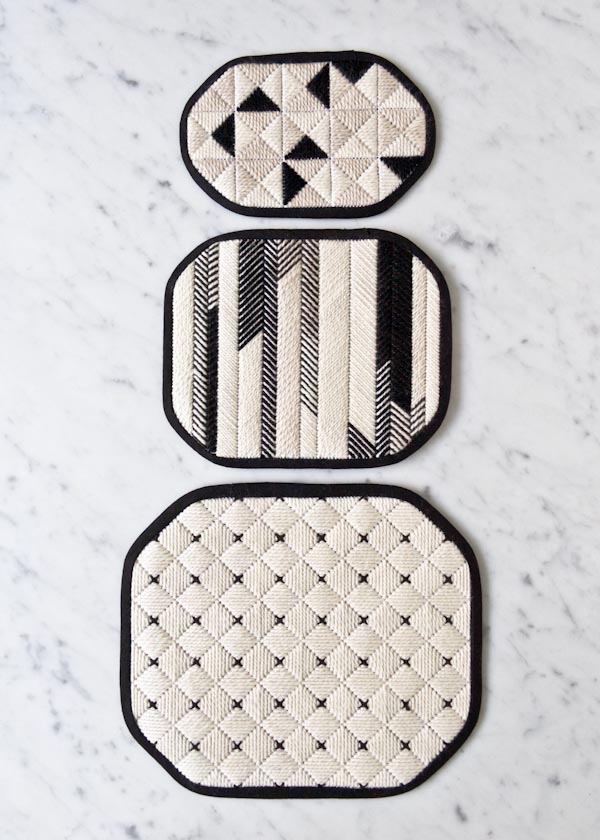
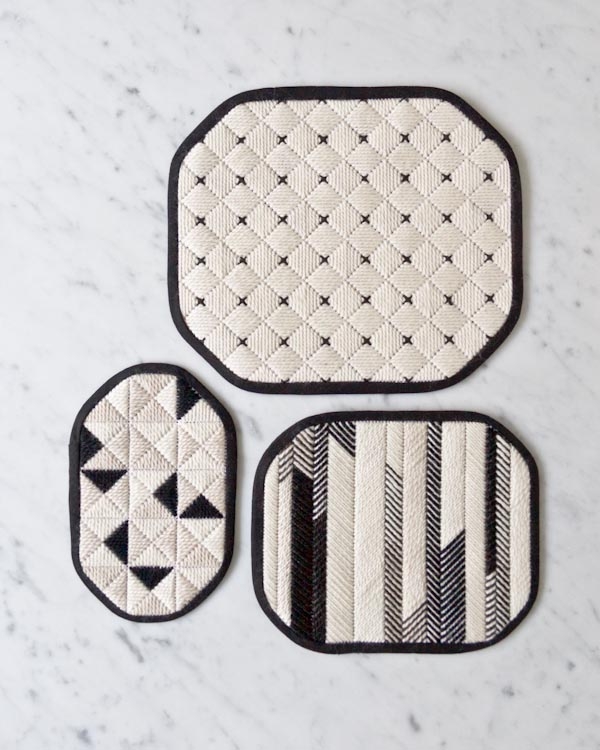
From castle tapestries to elaborate tissue box covers, needlepoint’s history is long and varied, but the basic foundation of almost all needlepoint stitches remains the same: the simple straight stitch. Our set of Graphic Needlepoint Trivets perfectly demonstrates the playful and surprising range of this super easy stitch.
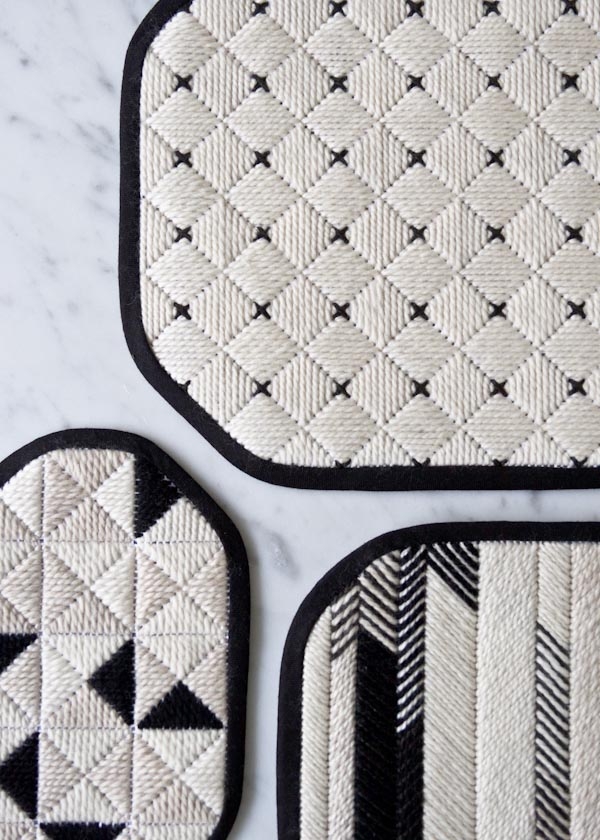
A field of diamonds and crosses, a jigsaw puzzle of triangles, and a sophisticated mash-up of herringbone stripes, these Graphic Needlepoint Trivets are a modern and welcome addition to needlepoint’s historical archive… And to your table, too! -Corinne
Materials

- 1 fat quarter of Fleur De Paris’s Blank Needlepoint Canvas, 10 mesh We used the color White.
- 5 skeins of Purl Soho’s Worsted Twist, Worsted Twist Heather, and Mulberry Merino.
- Yarn A: Purl Soho’s Worsted Twist in Heirloom White (NOTE: We no longer offer Worsted Twist, but choose from one of our other worsted/aran weight yarns.)
- Yarn B: Purl Soho’s Worsted Twist in Soft Black
- Yarn C: Purl Soho’s Worsted Twist Heather in Wheat Flour
- Yarn D: Purl Soho’s Mulberry Merino in Dark Loam (NOTE: We no longer offer Mulberry Merino, but choose from one of our other sport weight yarns.)
- Yarn E: Purl Soho’s Mulberry Merino in Heirloom White
- A needlepoint needle. We used size 16 from John James’ Craft Needle pack.
- A hand-sewing needle. We used size 7 from John James’ Craft Needle pack.
- ½ yard of Purl Soho’s Handkerchief Linen in Ebony (for making bias tape)
- One 18 x 18-inch piece of Wollfilz’s 100% Wool Felt, 1mm. We used the color Ecru.
- A 110-yard spool of Gutermann’s Cotton Sewing Thread in a color to match the bias tape. We used color 1001.
Recommended tools…
- Masking tape
- An 18mm Bias Tape Maker
- A zipper foot for your sewing machine.
These are enough materials to make the three Trivets you see here, with plenty of yarn leftover to make more!
Sizes
Small: 5 x 7 ½ inches
Medium: 7 x 8 ¼ inches
Large: 9 x 10 ¼ inches
Pattern
Prepare the Canvas
Use Scissors to cut the canvas 1 inch larger than the size of your finished work.
For the Small Trivet, cut a rectangle of canvas that measures 6 x 8 ½ inches.
For the Medium Trivet, cut a rectangle of canvas that measures 8 x 9 ¼ inches.
For the Large Trivet, cut a rectangle of canvas that measures 10 x 11 ¼ inches.
Use masking tape to wrap the raw edges of the canvas. This prevents yarn from snagging on the canvas as you work.
Finally, mark the top of the canvas so that you stay oriented.
The Straight Stitch
The basic Straight Stitch is the foundation of all of the patterns we used to make our Trivets. Once you have mastered this basic stitch, you can make any of the patterns you see here, or create your own!
Cut a length of yarn that is no longer than 24 inches and thread it onto the size 16 needle.

Bring the needle from the back to the front of the canvas at point 1. Pull the yarn through until a 2-inch tail remains on the back of the work.
Insert the needle back through the canvas at point 2. Holding down the tail on the backside, pull the yarn through, tugging gently so that the stitch lies flat and relaxed, not strained or tight.
Bring the needle back to the front at point 3, making sure to sew over the tail of yarn in the back as you work.
Continue to stitch in this manner, keeping in mind that all odd numbers on the charts used here (and in most needlepoint graphics) represent bringing the needle from the back to the front of the canvas, and all even numbers represent pushing the needle from the front to the back.
You can make the basic Straight Stitch in any length and in any direction.
When you have reached the end of a design or a length of yarn, finish the stitch by sliding the threaded needle under 2 inches of worked stitches on the wrong side of the canvas and snip the yarn at the exit point.
Now, here’s how we used the basic Straight Stitch to create our Trivets…
Triangle Pattern
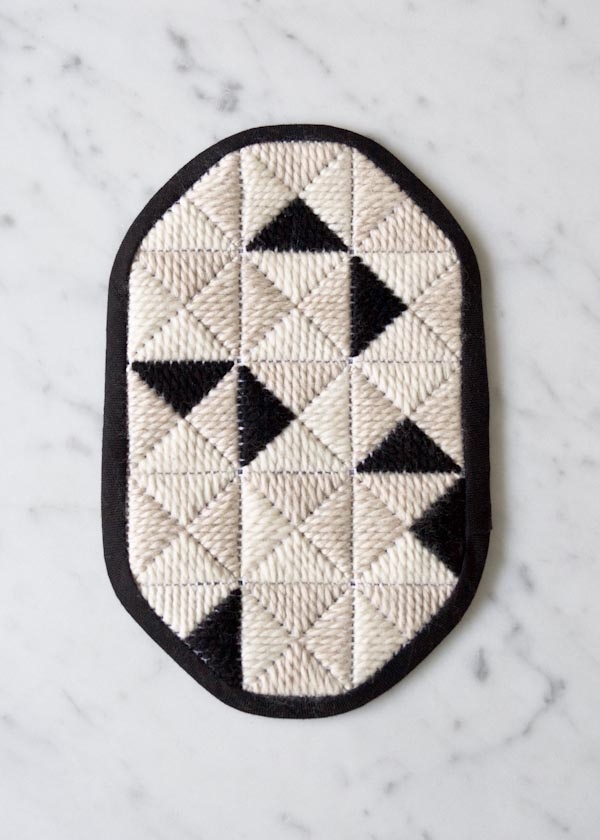
Make a Triangle

To make a Triangle, follow the chart above to make a row of 11 vertical Straight Stitches in increasing, and then decreasing length, keeping in mind that all odd numbers represent bringing the needle from the back to the front of the canvas, and all even numbers represent pushing the needle from the front to the back.
Make a Row of Triangles

To make a row of Triangles, work from left to right, starting the next Triangle one square to the right of the first.

Make the next row of Triangles directly below the first, working this row as a mirror image of the first. Keep in mind that the longest stitches of the two rows enter and exit through the same hole.
Make the third row of Triangles directly below the second, again working this row as a mirror image of the previous row. The stitches along the straight edge of the Triangles in the second and third rows enter and exit through the same holes.
Make a Column of Triangles

To make a column of Triangles use the chart above to stitch 11 horizontal Straight Stitches of increasing and then decreasing length, keeping in mind that some of the stitches enter and exit the canvas through holes already used for the row of Triangles.
Start the next Triangle shape of the column in line with and one square below the first.

Continue to work columns of Triangles down the canvas in the same manner as you stitched the rows, alternating the direction of the Triangles with each new column.
Chart: Small Trivet
The chart below shows how we used the Triangle Pattern to stitch our Small Trivet in three colors. Working all the rows and then all the columns, make sure to center the design so that its horizontal and vertical edges are about 1 inch from the edges of the canvas.


Yarn A: Purl Soho’s Worsted Twist in Heirloom White
Yarn B: Purl Soho’s Worsted Twist in Soft Black
Yarn C: Purl Soho’s Worsted Twist Heather in Wheat Flour
When you’re done stitching, skip to the Finish section, below.
Striped Pattern
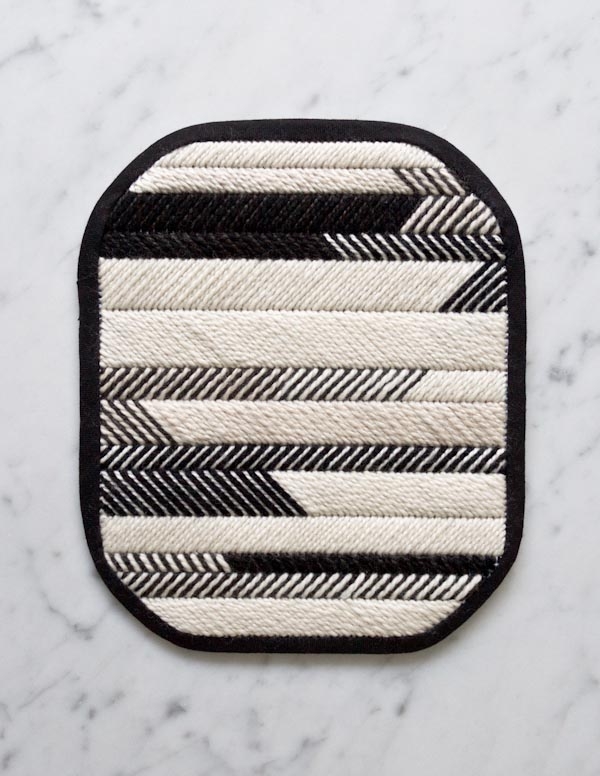
You work the Striped Pattern in a series of diagonal Straight Stitches that alternate direction row by row. In this pattern, the size of the Straight Stitch varies from row to row and the colors alternate every other stitch.
Make a Row of Stripes

To make a row of the Striped Pattern, use the first color of yarn and follow the chart above. Skip one square of mesh between each stitch. Keep in mind that all odd numbers represent bringing the needle from the back to the front of the canvas, and all even numbers represent pushing the needle from the front to the back.
Moving from left to right, work across the width of the canvas. When you reach the end of the row, start stitching the row below, working from right to left. Note that the tops of the stitches in the second row enter the canvas one hole to the right of the bottoms of the stitches from the first row.
Continue until you reach the end of the length of yarn. Weave in the end on the back of your work.

Now, using the second color, follow the chart above, stitching in the squares of mesh you skipped with the first color. Work until you reach the end of the length of yarn. Don’t worry if your yarn ends before or after the stitches you made using the first color. The staggering of colors is part of the charm of this design!
Now, with the third color, start where there are gaps in the design and continue to work the Striped Pattern.
Here is an example of three complete rows of the Striped Pattern.

Note the following details:
1. The stitches at the beginning and end of the rows descend in length to create straight side edges.
2. The stripes of each row vary in length, but the angle of each stitch remains consistent.
Chart: Medium Trivet
The chart below shows how we used the Striped Pattern to stitch our Medium Trivet in 5 colors. Don’t worry too much about making the same number of stitches as we did for each color. Just work until the end of each length of yarn and move on to the next piece. To keep the colors staggered, cut your yarn in a range lengths from 18 – 24 inches. Also, make sure to center the design so that its horizontal and vertical edges are about 1 inch from the edges of the canvas.


Yarn A: Worsted Twist in Heirloom White
Yarn B: Worsted Twist in Soft Black
Yarn C: Worsted Twist in Wheat Flour
Yarn D: Mulberry Merino in Heirloom White
Yarn E: Mulberry Merino in Dark Loam
When you’re finished stitching, skip to the Finish section, below.
Diamond Pattern

Make a Diamond

To make a Diamond, follow the chart above to make a row of 11 vertical Straight Stitches in increasing and then decreasing length, keeping in mind that all odd numbers represent bringing the needle from the back to the front of the canvas, and all even numbers represent pushing the needle from the front to the back.
Make a Row of Diamonds

To make a row of Diamonds, work from left to right, starting the next Diamond one square to the right of the first.

Make the next row of Diamonds in the same manner, directly below the first. Keep in mind that the longest stitches of the two vertically adjacent Diamonds enter and exit through the same hole.
Make a Column of Diamonds

To make a column of Diamonds, use the chart above to stitch 11 horizontal Straight Stitches of increasing and then decreasing length, keeping in mind that all of the stitches enter and exit the canvas through holes already used for the rows of Diamonds.
Start the next Diamond of the column in line with and one square below the first.
Fill in the Edges

Use the chart above to finish the side edges of the Diamond Pattern with Triangles made of 11 horizontal straight stitches of increasing and then decreasing length.

Use the chart above to finish the top and bottom edges of the Diamond Pattern with Triangles made of 6 horizontal straight stitches of decreasing length.
Chart: Large Trivet
The chart below shows how we used the Diamond Pattern to stitch our Large Trivet. We used …
Yarn A (main color): Purl Soho’s Worsted Twist in Heirloom White
Yarn D (accent color): Purl Soho’s Mulberry Merino in Dark Loam
Working all the rows and then all the columns, make sure to center the design so that its horizontal and vertical edges are about 1 inch from the edges of the canvas.

With Yarn A, start with the Diamond marked “1,” above, and work to the right. Work all the horizontal rows, which are made out of vertical Straight Stitches.
When you have finished all of the rows, start stitching the columns at the Diamond marked “A.” Work all the columns, which are made out of horizontal Straight Stitches.
When you have finished stitching the rows and columns, stitch the side and top edges.
Stitch the Crosses

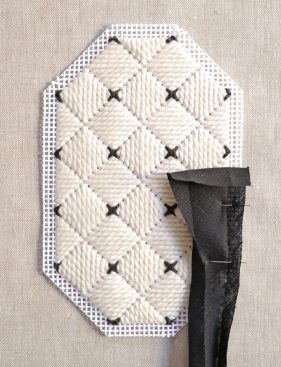
With Yarn D, stitch the Crosses at the points where the shortest stitches of the rows and columns converge, where a small square of the canvas is exposed. Note that you stitch the Crosses at half- and three quarter-size along the side edges.
Finish
Prepare the Binding
For detailed instructions on how to create single fold bias tape to use as Binding for your Trivets, please visit our Making Single Fold Bias Tape Binding tutorial. Keep in mind that each Binding strip should measure 4 inches longer than the circumference of your Trivet, not the 12 inches recommended in the tutorial for quilts.
Prepare the Canvas for Backing

Trim the canvas ¼ inch from the design on all sides.
Use the trimmed canvas as a template to cut a piece of felt to the same dimensions.
Attach the Binding
Open up the folds at one end of the prepared bias Binding. Fold the short raw edge ¼ inch towards the wrong side and press. Refold the long folds of the Binding.
Lay the Trivet with its right side facing up.
Open one long fold of the Binding. Starting with the Binding’s short folded end and with its wrong side facing up, align the Binding’s open edge with the raw edge of the canvas.
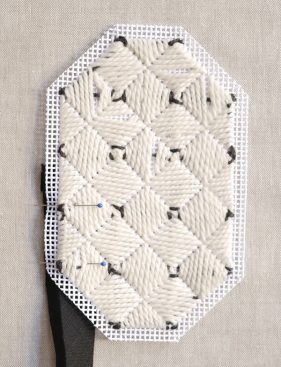
Pin the Binding to the Trivet, pinning from the wrong side. This may seem counter-intuitive, but here’s why: You will sew the Binding to the Trivet with the wrong side of the Trivet facing up. Keeping the pins on the wrong side of your work will help it pass through the machine with ease.

Pin around all edges of the Trivet, carefully easing the Binding around the corners of the Trivet and making sure not to pull the Binding tight as you work.
When you have pinned all the way around, trim the Binding so that there is a 1-inch overlap of the two ends, as shown above.

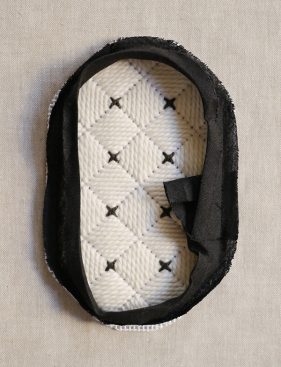
With the wrong side of the Trivet facing up, use your machine’s zipper foot to sew the Binding down, sewing right next to the needlepoint stitches. Sew around all sides.
When you have finished sewing, trim the sharp corners of the canvas to match the curve of the Binding.
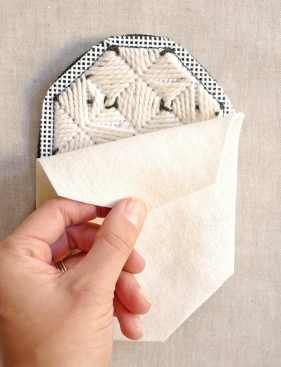
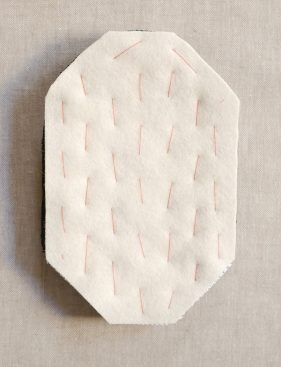
Lay the trimmed felt piece on top of the wrong side of the Trivet. Hand sew the felt to the Trivet with long basting stitches, making sure that there are no puckers or wrinkles in the felt.

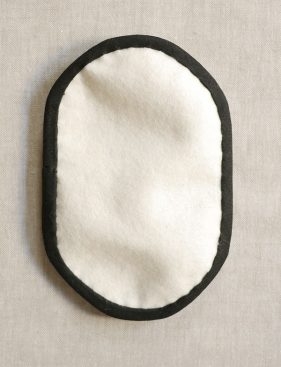
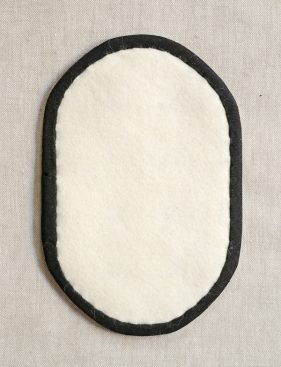
Once the Trivet and the felt piece are basted together, trim the felt so that its edges run flush with the raw edges of the canvas. Then, wrap the Binding around the edge of the canvas and felt, and use the size 7 needle to sew to the Binding to the felt with a slip stitch.
Remove the basting stitches. You may find that the felt balloons out from the back of the Trivet. To fix this, lay the Trivet with the wrong side facing up and press with a steam iron. This will condense the fibers of the wool felt so that it lies flat against the surface of the Trivet.
You’re all done!
The post Graphic Needlepoint Trivets appeared first on Purl Soho | Beautiful Yarn For Beautiful Knitting.
